There are two available methods to adding your employees into the HReasily system:
Add Individual Employee
Bulk Upload Employee List (Recommended)
If you've got only a handful of employees to input into the system, you may opt to add them individually. Otherwise, it is highly advised for you to utilise HReasily's bulk upload function.
Nevertheless, we'll be guiding you through both methods.
Step 1: Head over to Staff Directory

Step 2: Select ADD EMPLOYEE

Step 3: In the pop-up window, you'll need to fill up the following details before hitting SAVE
Employee ID
Department
‣ Learn how to create departmentsNick Name
Full Name*
Email Address[Note: This field is compulsory if employee is granted online access]
Gender*
Date of Birth*
Country of Nationality*
Residency Status*
Type of Resident *
IC/Kad Pengenalan * (Fill without hyphen or '-')
Will this employee be drawing salary, fee or allowances?[If checked, this employee will be included in the payroll run]
Additional Info [Optional]:
Country Code
Mobile Number
Address 1
Address 2
Postal Code
Access Permission:
Give this employee online access‣ If this box is checked, an email will automatically be sent to the respective employee to setup an account. With online access granted, employees can view their profiles, retrieve payslips, apply leave, claims and time-in/out via HReasily's mobile app [Android | iOS]
Step 4: Select EDIT on the Employee Payroll Info section

Step 5: In the pop-up window, fill up the following details before hitting SAVE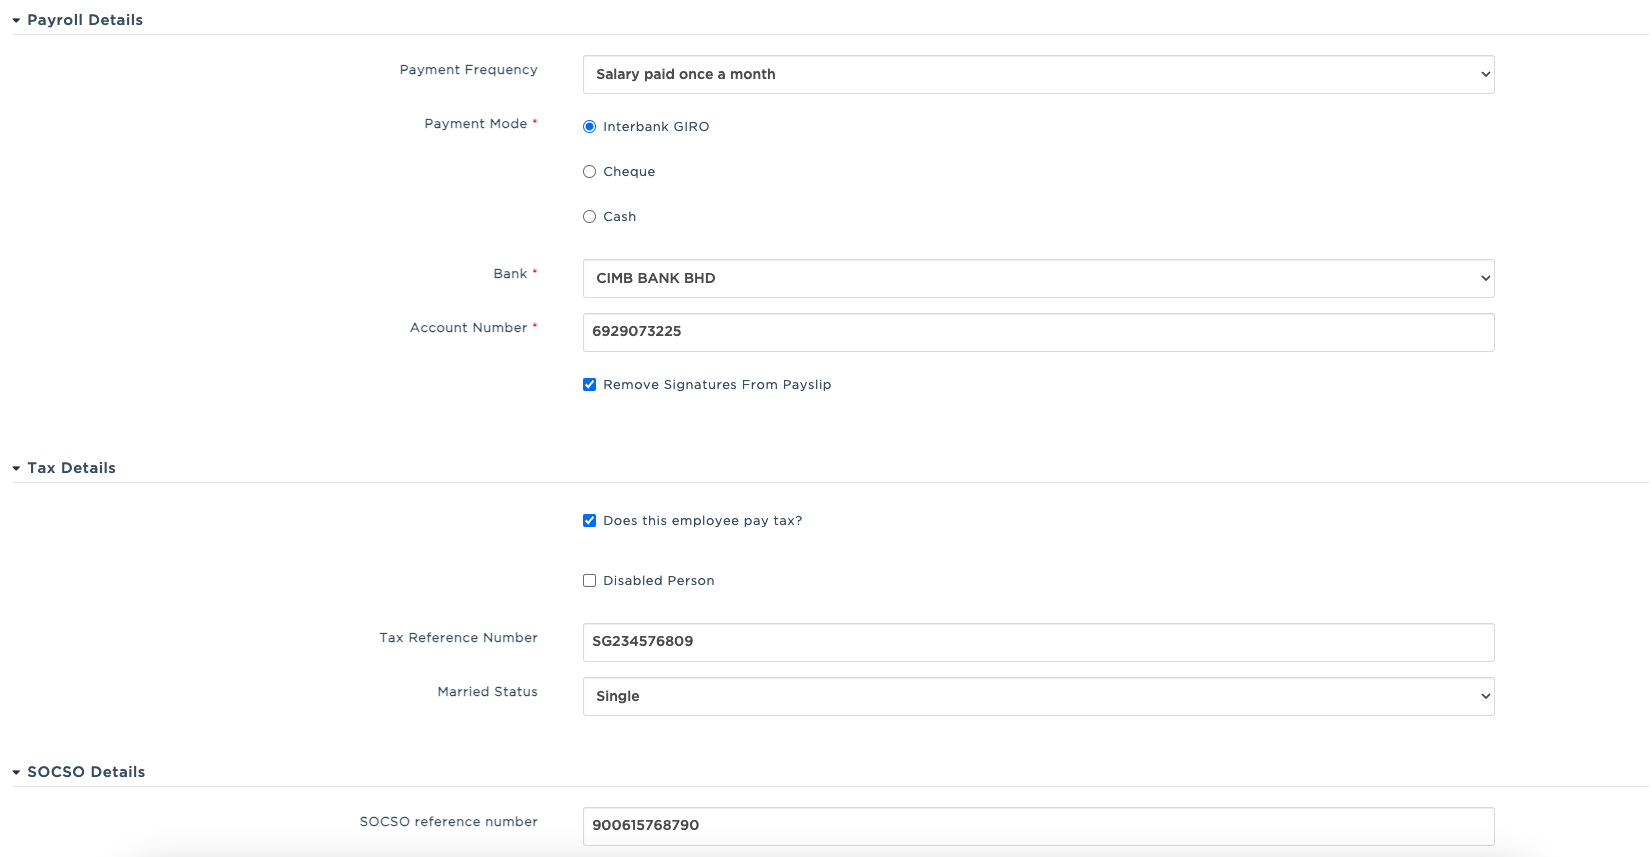
Payroll Details
Payment Frequency:*‣ Once a month (Monthly)
Payment Method:*
‣ Interbank Giro
◦ Bank*
◦ Branch Code*
◦ Account Number*
‣ Cheque
‣ Cash
‣ Credit CardRemove Signature from Payslip
[Note: Only applicable to Cheque and Cash payment method]
Tax Details*
Does this employee pay tax?
[If checked, MTD/PCB will be calculated for employees once they hit the required threshold. It is recommended to tick this option in case the staff income becomes taxable.]Disabled Person
[If checked, the individual will be accounted for an additional personal relief of RM6,000]Tax Reference Number
Marital Status
‣ Single
‣ Single with children
* Total Children
‣ Divorce or widowed
* Total Children
‣ Married and spouse is working
* Total Children
‣ Married and spouse is NOT working
* Total Children
‣ Married and spouse is working and disabled
* Total Children
‣ Married and spouse is NOT working and disabled
* Total Children
Socso Details*
Socso Reference Number
Socso Type
‣ None
‣ Bencana pekerjaan dan Ilat
[Applicable for employees below the age of 60]
‣ Bencana pekerjaan sahaja
[Applicable for employees aged 60 and above. Learn More]
‣ Does this employee contribute to EIS?
[Compulsory for all employees between the age of 18 - 60*. Learn More]
EPF Details*
Does this employee contribute to EPF?
[If checked, employee and employer contribution will be calculated]EPF Contribution Rate:
‣ 11%
[By default, HReasily calculates the EPF as per the table below. In the event a company contributes more than the minimum requirement, the additional amount of percentage is to be indicated in the Employee/Employer EPF Voluntary field respectively.]
EPF Voluntary Contribution Type:
‣ Percentage
‣ Fixed Amount
‣ NoneEmployee EPF Voluntary
Employer EPF Voluntary
Tax Year
Tax Details*
If an employee was previously employed in the same financial year, his/her prior tax submissions can be updated here to ensure an accurate tax calculations and EA form at the end of the Tax Year.
Tax Details: Employee MTD and Income Info (in MYR)
Tax Details: Employee Deduction Info (in MYR)
Tax Details: Employee BIK (Benefit in Kinds) Info (in MYR)
Tax Details: Employee Perquisite Info (in MYR)
For more information, read up our full guide here.
Other Settings*
Payslip notification by email[Note: Online access must be granted to the employee to enable this function.]
Receive passworded payslip
Does this employee contribute to HRDF?
Does this employee contribute to Zakat?
Step 6: Scroll down to the Current Employment section and select EDIT.

Step 7: In the pop-up window, fill up the following details before hitting UPDATE.

Employment Details*
Probation
Starting with a probationary period helps maintain proper records of an employee’s joining and confirmation dates.
- Join Date and Effective Date should be the same when selecting Probation.
Confirmed
If an employee starts with Confirmed status:
- The Effective Date will automatically be the Join Date.
- You cannot set a different Join Date.
Salary Details*
Salary Currency
Salary Amount
[If Basic Salary Type is Hourly and Working Hours Type is Fixed, enter only the hourly pay rate]Salary Effective Date
[By default, the effective date follows the Date Joined. Updating of this field is useful when updating an employee's salary increment or promotion]
Step 8: Lastly, scroll down to Working Hours Settings and select EDIT.

Basic Salary Type*
‣ Monthly
[Commonly used for executive level employees]
‣ Hourly
[Commonly used for blue collar employees]Working Hours Type*
‣ Fixed
[Note: Fixed work hours require employees to clock-in/out within a designated time slot. Example: 9am - 6pm, Mon to Fri.]
‣ Dynamic
[Note: Dynamic work hours measures total number of working hours in a week]Working Hours in a week*
[Hours indicated does not include break time]
If Working Hours Type is Fixed, go ahead and update the Working Schedule Detail based on your company's operation hours.

If Basic Salary Type is Hourly and Working Hours Type is Dynamic, add Dynamic Working Hours in the Working Schedule Detail section.

[Note: If you have different pay rates for weekday and weekends, create 2 separate dynamic working hours schedule and indicate the pay rates respectively.]
Was this article helpful?
That’s Great!
Thank you for your feedback
Sorry! We couldn't be helpful
Thank you for your feedback
Feedback sent
We appreciate your effort and will try to fix the article