With the team setup completed, we're now ready to add schedule(s) and have them assigned to employees accordingly.
There are 3 parts to this guide:
i. Creating Schedule
1. Go to Company Information
2. Navigate to the Scheduling tab
3. On the scheduling module, navigate to the SCHEDULING tab
4. Next, for first time users, go ahead and click the center of the page to add your first schedule.
5. In the pop-up window, indicate the Start and End Date as well as the associated Team then click ADD.
ii. Adding Shifts
6. On the scheduling page, go ahead and click the + button to begin creating shifts
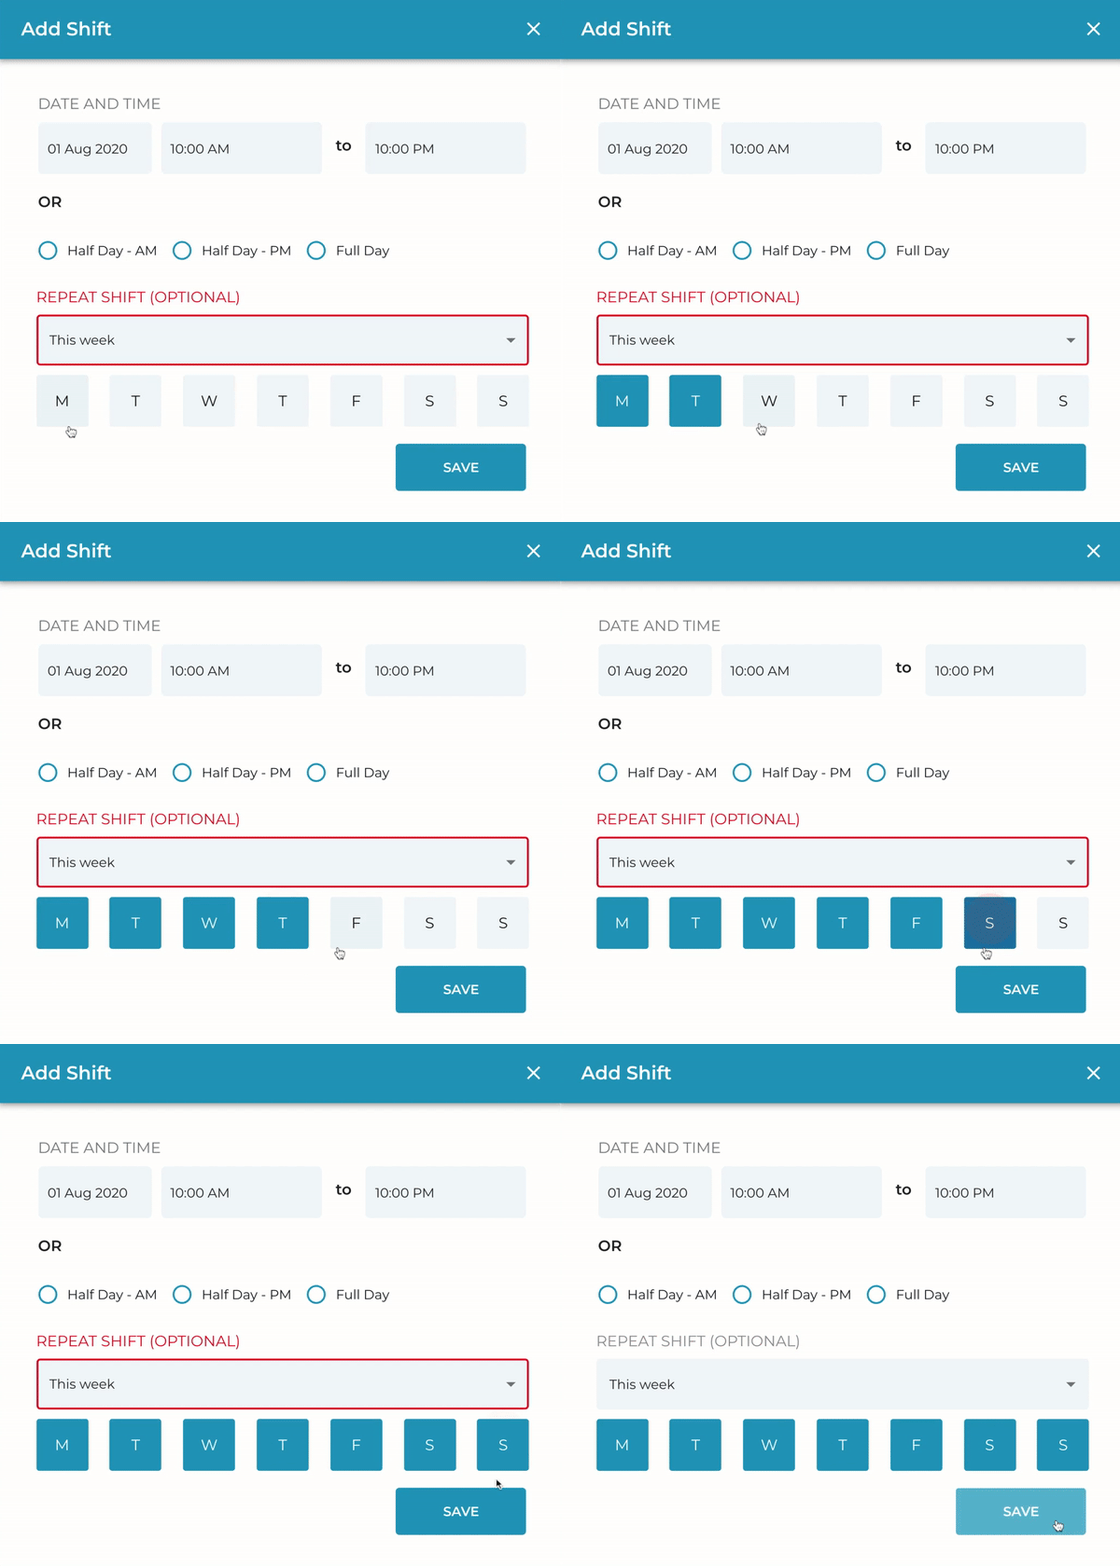
7. In the pop-window, indicate the shift DATE & TIME. If the shifts are repeating, go ahead and utilise the REPEAT SHIFT function to indicate which days to repeat the shifts.

8. For periods spanning across multiple weeks, you may toggle between weeks by clicking on arrows < >
iii. Assigning Employee(s)
1. To assign an employee to a shift, simply click on an Unassigned shift
2. In the pop-up window, indicate the task that will be assigned. For new tasks, click Add task.
3. Next, select the employee you'd like to assign to the specified task.
Notes:
If employee has been assigned to a separate schedule on the same day, the status will show Unavailable
If employee has been assigned to other shifts, the remaining hours will show under Hours left this week.
4. Once all the shifts have been assigned, go ahead and click Publish
Next Guide: Syncing Scheduling to Time Attendance
Was this article helpful?
That’s Great!
Thank you for your feedback
Sorry! We couldn't be helpful
Thank you for your feedback
Feedback sent
We appreciate your effort and will try to fix the article


