
There are two available methods to adding your employees into the HReasily system:
Add Individual Employee
If you've got only a handful of employees to input into the system, you may opt to add them individually. Otherwise, it is highly advised for you to utilise HReasily's bulk upload function.
Nevertheless, we'll be guiding you through both methods.
Add Individual Employee
Step 1: Basic Information
Head over to Staff Directory
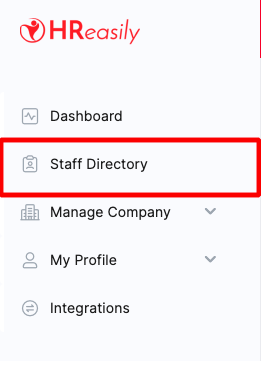
Select ADD EMPLOYEE
In the pop-up window, you'll need to fill up the following details before hitting SAVE
Employee ID
Department - Learn how to create departments
Nick Name
Title
Surname*
Given Name*
Chinese Name
Email Address
[Note: Either email address or mobile number must be entered. This field is compulsory if employee is granted online access]Private Email
Gender*
Date of Birth*
Country of Nationality*
ID Type*
HKID/Passport No*
Additional Info [Optional]:
Country Code
Mobile Number
Marital Status
Residential Address:
Flat Number
Floor Number
Block Number
Building Name*
Estate
Street Name*
District
Address Area
Postal Code*
Country
Postal Address [Optional]:
Address 1
Address 2
Postal Code
Country
Access Permission:
Give this employee online access
‣ If this box is checked, an email will automatically be sent to the respective employee to create their password. With online access granted, employees can view their profiles, retrieve payslips, apply leave, claims and time-in/out via HReasily's mobile app [Android | iOS]
After saving the basic information, you will be redirected to the payroll information page
Step 2: Payroll Information
Select EDIT on the Employee Payroll Info section

In the pop-up window, fill up the following details before hitting SAVE

Payment Frequency:*- Once a month (Monthly)
- Twice a month (Fortnightly)
Payment Method:
- Interbank Giro. Employee's salary is paid via GIRO the the provided bank account below.
- Bank Name*
- Branch Code*
- Account Number*
- Full Name in Bank Account*
- Cheque
- Cash
Employee will not be included in the generated GIRO file

- MPF Scheme
- Enable Voluntary MPF
- ORSO Employee contribution rate
- ORSO Employer contribution rate
- Class of Employee
If the MPF Trustees is HSBC Provident Fund Trustee (Hong Kong) Limited, you need to key in:
- Date Joined MPF Scheme
- Investment Fund Name
- Contribution Percentage


Self Employed Person
Do you provide accommodation for this employee?
[Note: If this setting enable, you need to input accommodation details]
Remove Signature from Payslip
[Note: Only applicable to Cheque and Cash payment method]
Other Setting

Payslip notification by sms
‣ Extended notification (Includes Basic Salary, Employee CPF contribution, Pay Items, Net Salary)
‣ Simple notification by SMS (Only Net Pay amount)
[Note: Notification via sms is only available for SG users with no additional charges. A phone number must be added in the basic info section to enable this feature]Payslip notification by email
[Note: Online access must be granted to the employee to enable this function]
Step 3:
Scroll down to the Current Employment section and select EDIT

In the pop-up window, fill up the following details before hitting SAVE

Designation*
[Example: HR executive, marketing executive, accounts executive etc]
Employment Status*

Probation
Its good to start with probation to have proper records when the employee joins the company and when the employee is confirmed.
Join date and Effective date should be the same when the status is probation
Confirmed
If you start with Confirmed, the effective date will also be the join date and you will not have the option to set a different join date.
Interns | Consultants | Temp/Contract Staff
- Resign | Dismissed
Note: Need to select Resigned Date, The official date of employee resigned from company. Payroll calculation will be based on this date
Salary Details
- Salary Amount[If Basic Salary Type is Hourly and Working Hours Type is Fixed, enter only the hourly pay rate]
- Salary Effective Date[By default, the effective date follows the Date Joined. Updating of this field is useful when updating an employee's salary increment or promotion]
Step 4
Lastly, scroll down to Working Hours Settings and select EDIT

Basic Salary Type*
- Monthly
[Commonly used for executive level employees] - Hourly
[Commonly used for blue collar employees] Working Hours Type*
- Fixed - Employees have regular, set days off (e.g., weekends off) every week. Mon to Fri.]
- Dynamic - Employees do not have fixed days off and their schedule may vary.
- Enter their total working hours/week
- eg 40 hrs 7 days a week
Working Hours in a week*
[Hours indicated should not include break time]
If Working Hours Type is Fixed, go ahead and update the Working Schedule Detail based on your company's operation hours.

If Basic Salary Type is Hourly and Working Hours Type is Dynamic, add Dynamic Working Hours in the Working Schedule Detail section.
Was this article helpful?
That’s Great!
Thank you for your feedback
Sorry! We couldn't be helpful
Thank you for your feedback
Feedback sent
We appreciate your effort and will try to fix the article